Video version:
Haven’t seen part 1? Check it out
This is part two on the tutorial on how to implement a Post Process based Scope Zoom. It is mainly an extension of the first part. Clarifying and expanding on concepts and improving your implementation.
Refresher this is how the concept works:
CustomDepth
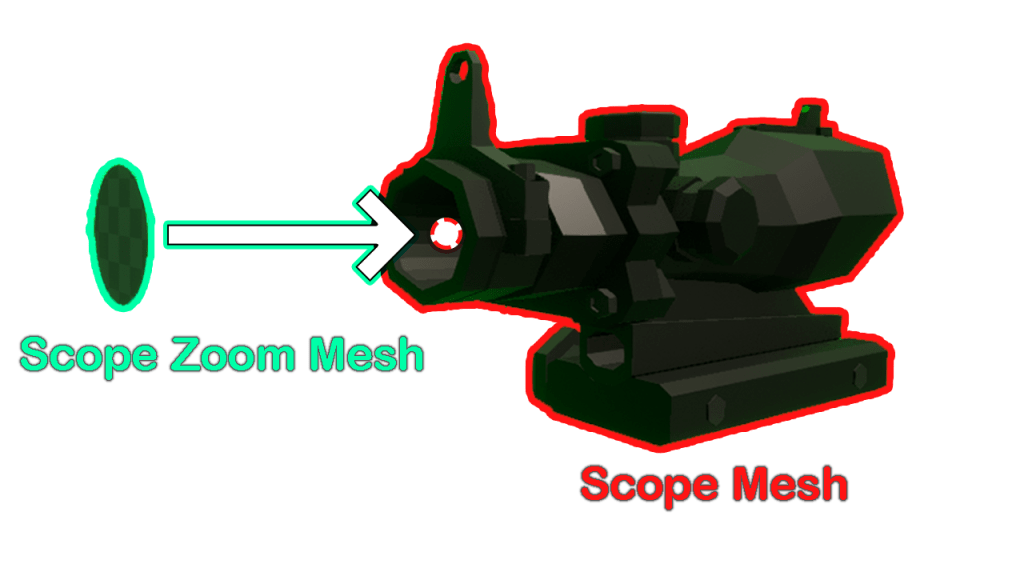
This diagram is how this method is generally implement. A mesh for your scope and then you have a separate “mask” mesh for the zoom area. Configure that to be visible in CustomDepth. In the Post Process Material, you identify the Mask Mesh on screen and you amplify that part of the screen.
In this part we will be reversing the implementation:
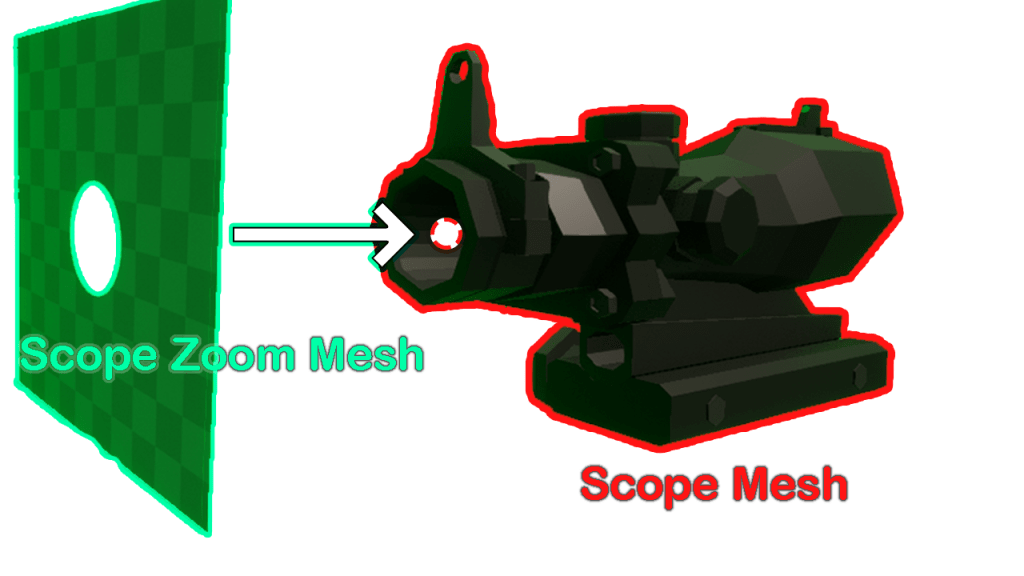
Stencil Depth
This implementation will allow us to fully utilize Stencil Depth, giving us more options on how to utilize Custom Depth techniques and Scope Zoom.
Disclaimer
- Make sure you’re familiar with how Custom Depth / Stencil Depth works. This guide assumes you are generally familiar with how that works.
- Links on to familiarize yourself on Custom Depth / Stencil Depth:
https://www.youtube.com/watch?v=PiQ_JLJKi0M&ab_channel=UnrealEngine
https://www.connburanicz.com/highlight-shaders
https://superyateam.com/2019/06/17/custom-depth-and-custom-depth-stencil-in-ue4/
- Links on to familiarize yourself on Custom Depth / Stencil Depth:
- Be already familiar with Post Process Scope Zoom. Check out part 1 if not yet.
General Stencil Bit Use
If you’re planning on utilizing Stencil Depth.
Have a general guideline on what stencil value to use. This means that you have to reserve specific stencil value for a use:
- 1 – Scope PP Mesh
- 4 – Thermal Targets

Reserving stencils for specific uses is important as this will allow you to utilize Stencil Depth for multiple uses.
This is also important so you can fix overlapping stencils.
Converting Post Process Scope from Custom to Stencil (Step by Step)
- Enable Stencil Depth on Project Settings

- Create folders for this demo PP_Demo, PP_Demo > mesh, and PP_Demo > PP_sight_materials.
- Download the demo assets from this link.
- Under Scope > fbx, drag all of the fbx files under PP_Demo > Mesh.
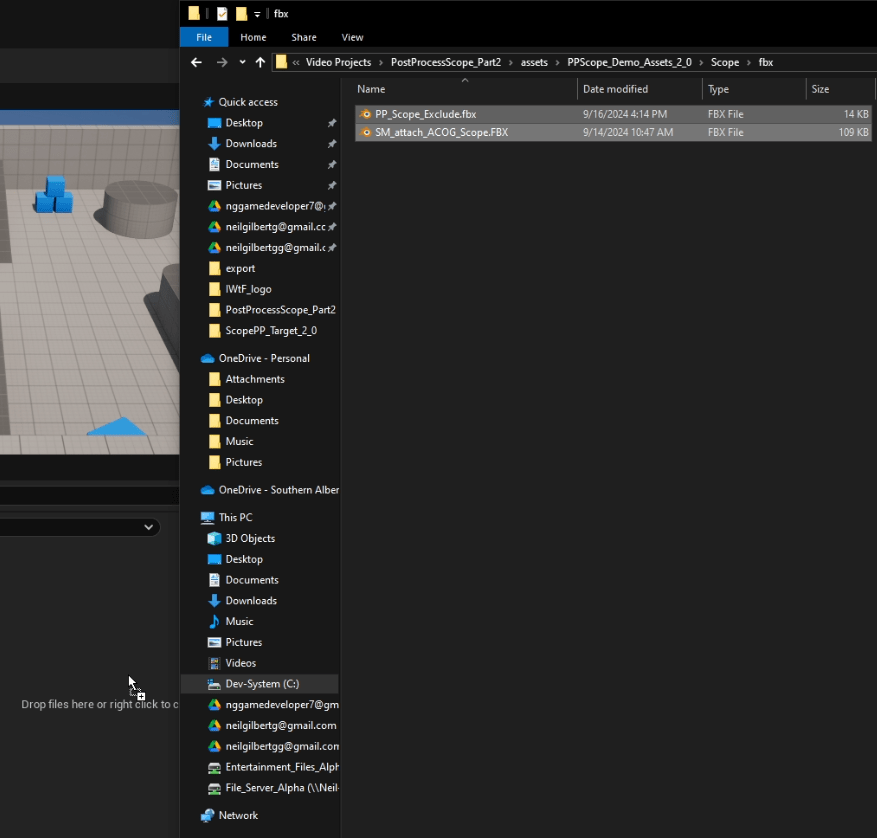
- Add a socket on the SM_attach_ACOG_Scope for the PP_Scope_Exclude to use.

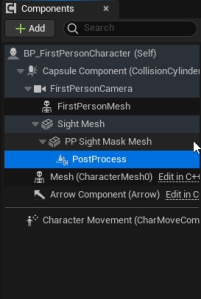
- Add Meshes to your character like:
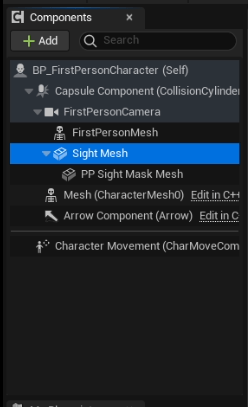
- Change the mesh to the imported meshes:
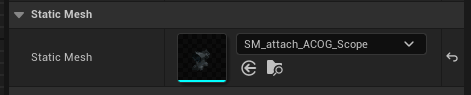
- Sight Mesh > SM_attach_ACOG_Scope
- PP Sight Mask Mesh > attach_ACOG_Scope_PP_Exclude
- For PP Sight Mask Mesh, change the Parent Socket to what you created earlier in the SM_attach_ACOG_Scope mesh.

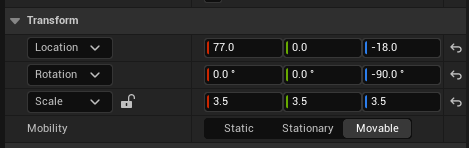
- Adjust scope mesh for better visibility:
- Adjust Scope PP Exclude Settings:
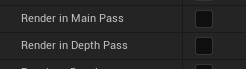
- Render in Main Pass > Unchecked
- Render in Depth Pass > Unchecked
- Render CustomDepth Pass > Checked
- CustomDepth Stencil Value > 1


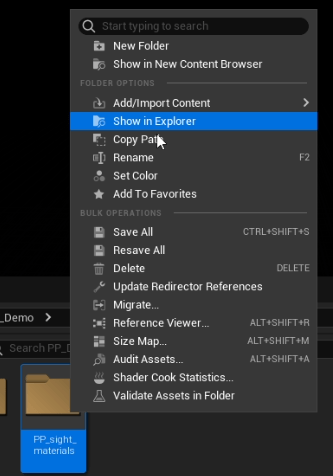
- Open PP_Demo > PP_sight_materials in explorer
- On your downloaded demo files go to PP > starting and copy and paste the uasset file in your PP_Demo > PP_sight_materials.

- In PP_Demo > PP_sight_materials, open M_Sight_PostProcess.
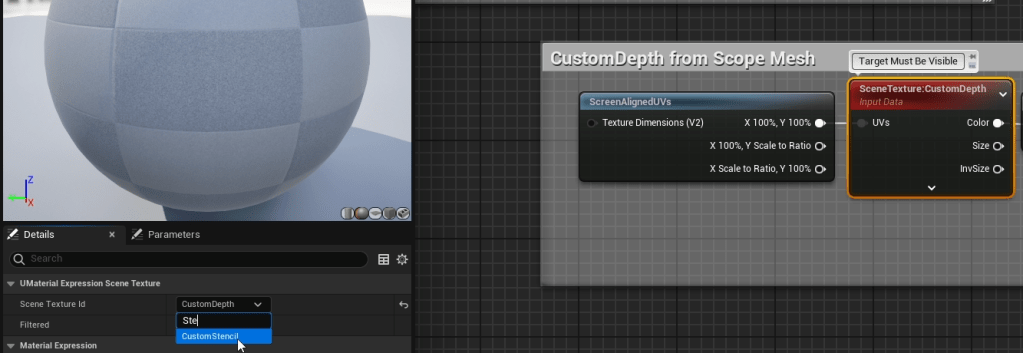
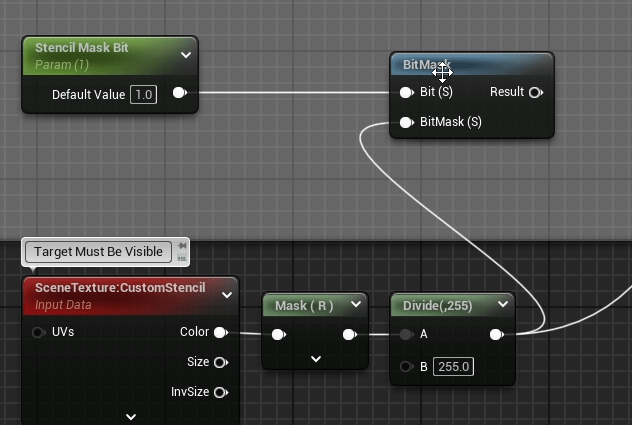
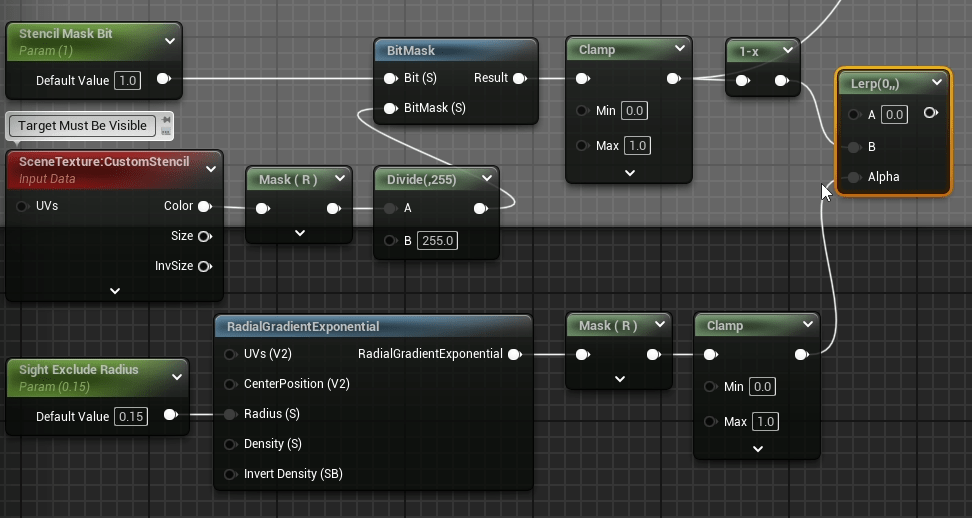
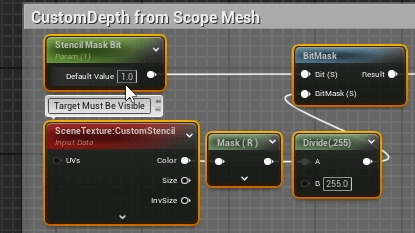
- Change the setting for SceneTexture node in the lowest group of nodes from CustomDepth to CustomStencil.
- Create a new Scalar Parameter, and name it Stencil Mask Bit, set the Default Value to 1.
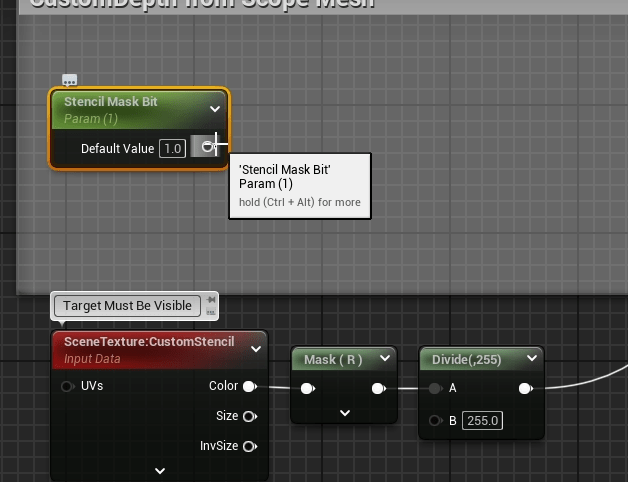
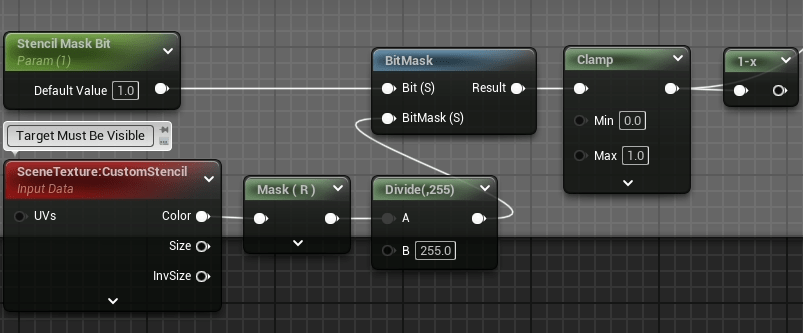
- Create a BitMask node, connect the Stencil Mask Bit to it’s Bit pin. Connect the Divide node to the BitMask pin.
- Connect the Result pin in the BitMask node to the Clamp node that already exists. Then create a OneMinus node from that node.
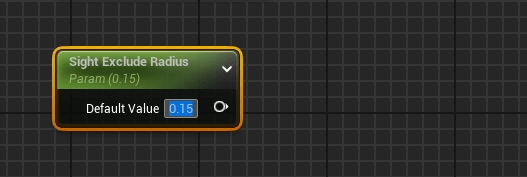
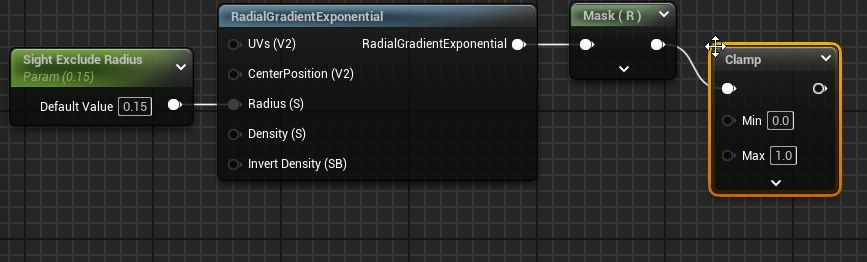
- Create a new Scalar Parameter node, name it Sight Exclude Radius. Set the Default Value to 0.15.
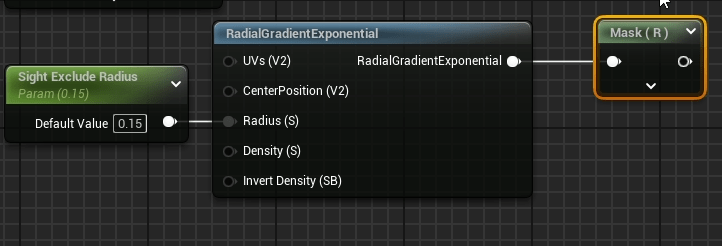
- Create a RadialGradientExponential node and connect the Sight Exclude Radius to the Radius pin

- Create a Component Mask node from the RadialGradientExponential node. Set its settings to only check R.
- From the Component Mask node create a Clamp node.
- Create a LinearInterpolate node, connect the group of nodes with RadialGradientExponential to the Alpha pin and connect the group of nodes with BitMaskt to the B node.
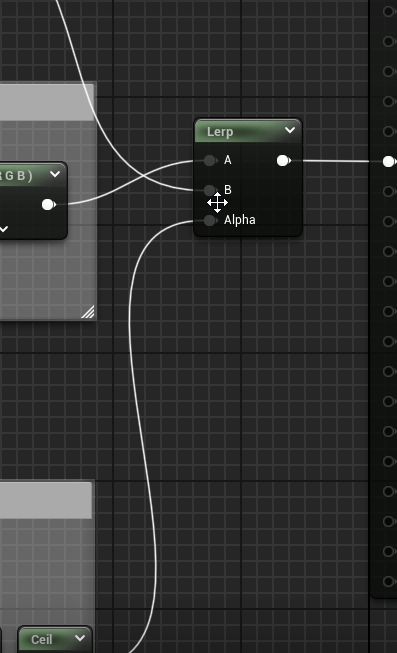
- From the Linear Interpolate node create a Ceil node. Connect the end to the existing Linear Interpolate in the upper section of the graph.
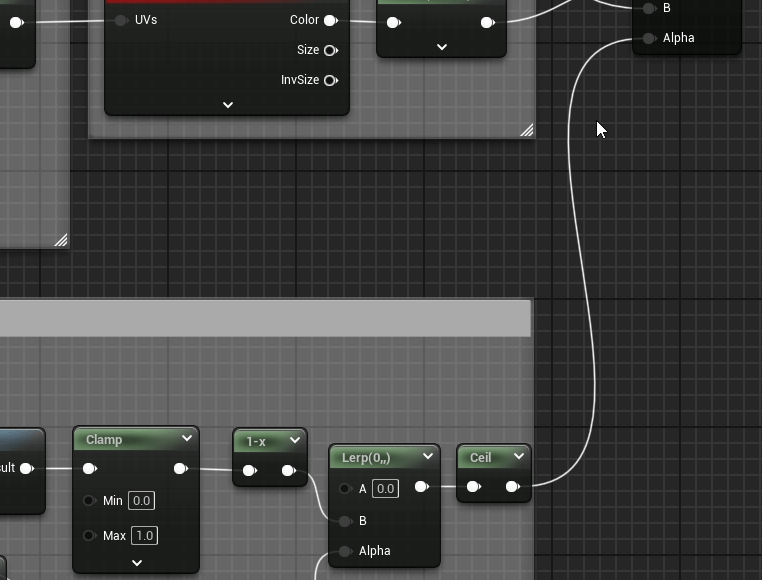
- Rearrange the pin connections in the upper Linear Interpolate node. Exchange the A and B connections.

- In the character, add a Post Process component. Set it’s properties to:
- Enabled > Checked
- Unbound > Checked
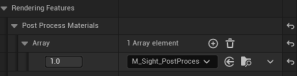
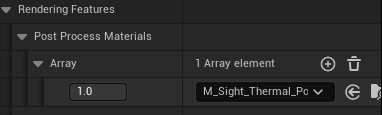
- Under Post Process Volume section, Rendering Features > Post Process Materials > Array, assign M_Sight_PostProcess as the material.


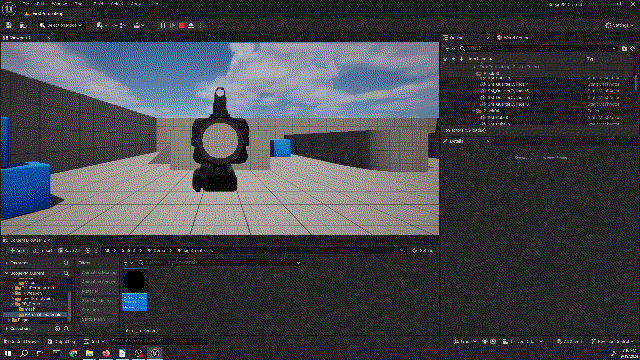
- You should be set! Now your implementation uses the post process zoom with Stencils.
Overview of the changes in the implementation


Final Result
Utilizing Multiple Meshes Stencil Depth
In the next part we will be utilizing Multiple Stencil Depths to create a Thermal Scope. It will be a simple implementation, mainly just to show how to utilize Stencils for both a Scope Zoom and Thermal.
Creating a Thermal Scope (Step by Step)
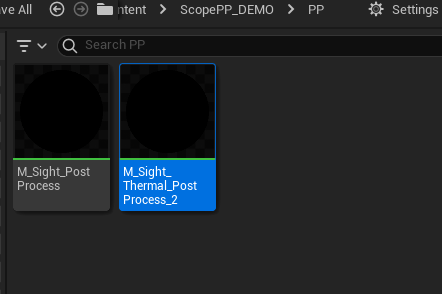
- Make a copy of the Post Process Scope Zoom Material. Name it as you want (I named mine M_Sight_Thermal_PostProcess_2)
- Create an additional 2 Scene Texture nodes in the between of the 2nd and last group of nodes

- Copy the Section that identifies the Stencil Depth and paste them in with the new group.
- Copy this section:
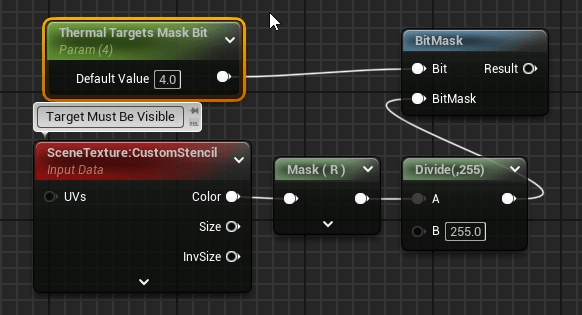
- Create a new Scalar Parameter named Thermal Target Mask Bit. Default value of 4. Connect it to the copied BitMask node.
- Create 2 new Component Mask nodes. Set them so R is only checked. Connect both of the new SceneTexture nodes to both of them respectively.

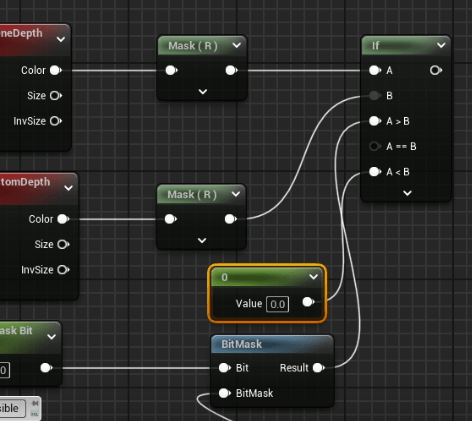
- Change the SceneTextureId for the 2 SceneTexture nodes respectively, one is SceneDepth, second is CustomDepth.

- Create an If node. Connect SceneDepth group of nodes to A pin. Connect CustomDepth group of nodes to B pin. Connect the Stencil Identifier group of nodes to A > B pin.

- Create a Constant node with the value of 0 and connect it to the A < B pin in the if node.
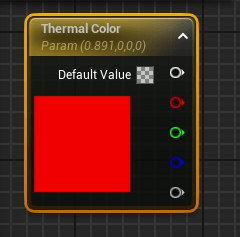
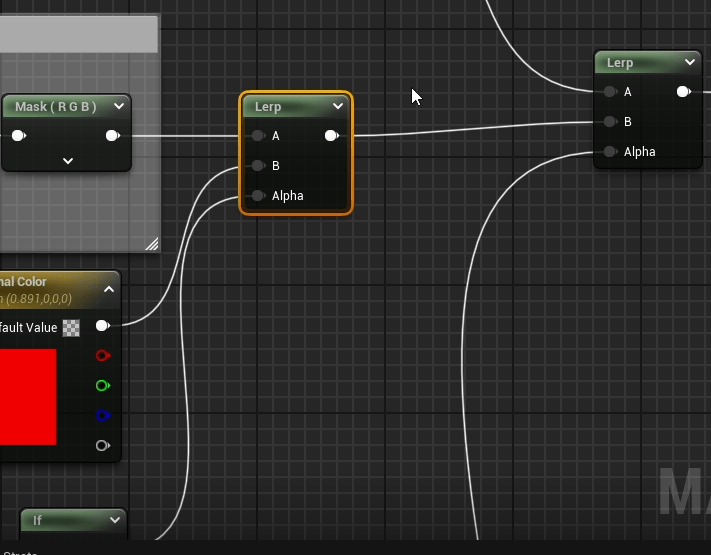
- Create a Vector Parameter and name it Thermal Color. Set the default value to whatever color you want.
- Create a Linear Interpolate node. Connect the old Scope Zoom effect to the A pin. Connect the Thermal Color to the B pin. Connect the If node to the Alpha pin. Connect the Linear Interpolate node to the B pin in the other Linear Interp node.
- Connect the zoom calculation group of nodes to all the UVs pin on the newly created SceneTexture nodes.

- Replace the Post Process Material referenced in the Post Process component in the playable Character with the M_Sight_Thermal_PostProcess material.
- In the Level Scene find a mesh that you want to be highlighted in the thermal effect. Modify the following properties:
- Render CustomDepth Pass > Checked
- CustomDepth Stencil Value > 4


- You should be set! Now your implementation uses the post process zoom with Stencils.
Overview of the changes in the implementation


Final Result:

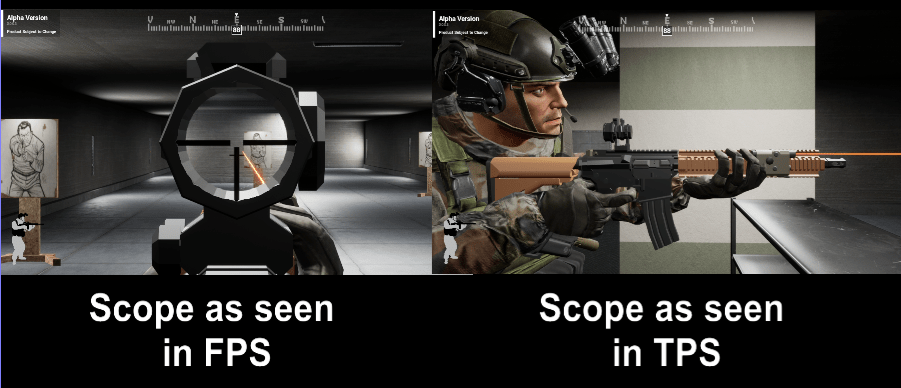
Improving Visibility on the Scope
For improving scope visibility, a simple solution is changing the scale of the scope while it is in use. This will make the scope appear 2d in the FPS perspective.