
This post mainly for documentation purposes for marketplace item found in this link.
Product Summary
Utilizes Hand Reference Based Weapons Animation concept to create FPS and TPS animation system that attempts to make do an accurate hand animation for weapons and still have the smoothness of a traditional first person shooter.
It is intended to be a good starting point if you want to utilize or learn about this concept yourself. It also can be utilized as a backbone for the animations in your own game. This contains blueprints, animations (more than 100 custom made animations) and meshes tailored for this style of animation all integrated and ready to use.
How to Use:
Quick and Easy Method
This method is used when you want to use the prepackaged Character and Weapon class that comes with this Content Pack.
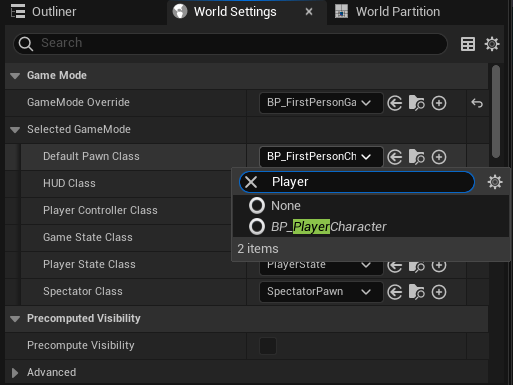
- Go to World Settings, open the Selected GameMode drop down, change Default Pawn Class to “BP_PlayerCharacter”
- Find BP_Weapon_Demo in the content pack folder, drag it to Level Scene to place it in. Finally, adjust the weapon in scene so it’s easier to pick up.

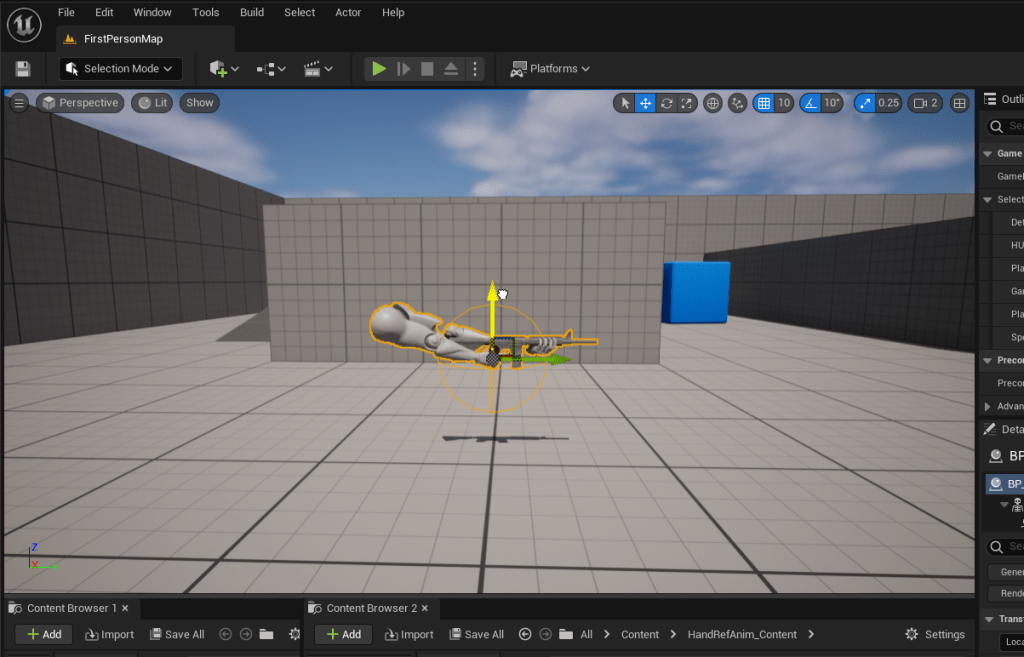
- Start Game and Pickup Weapon
Modular Method
This method is used when you want to apply this content to a new character or a character of your own. Starts with a completely empty character, applies the content and startup to use.
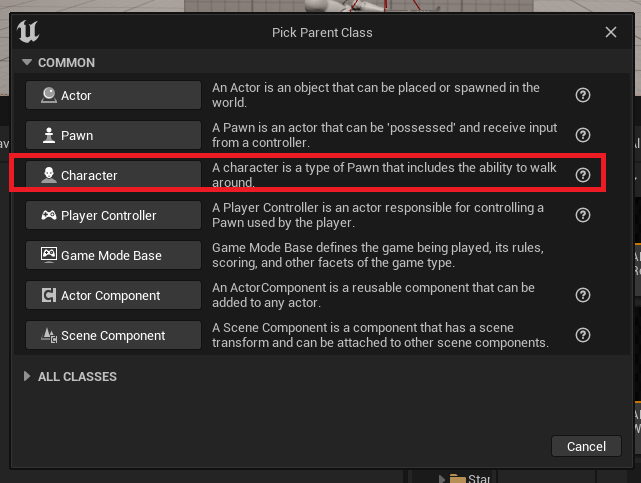
- Create new Blueprint with Character as it’s Parent Class.
- Name appropriately and open newly created BP
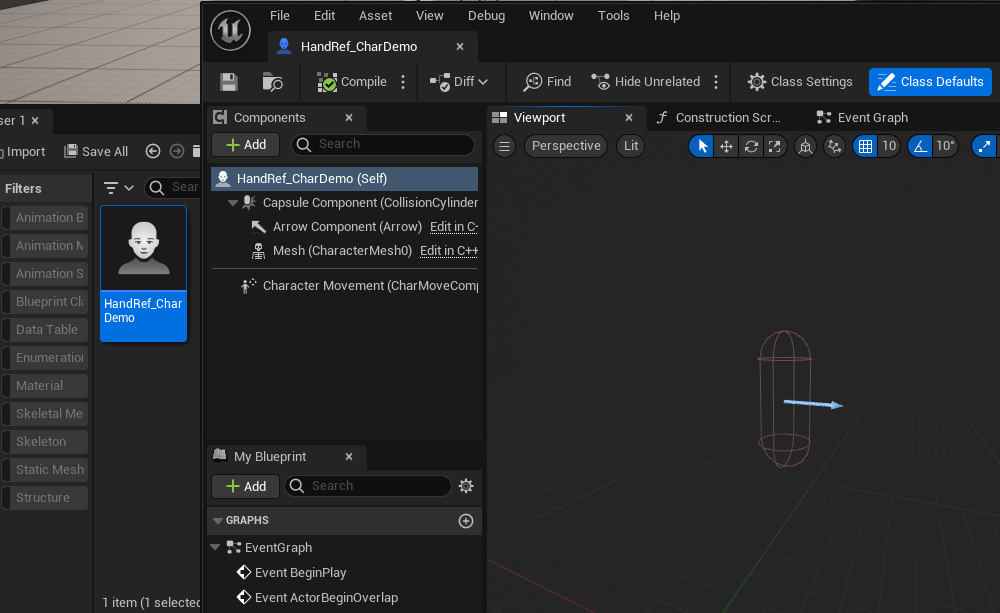
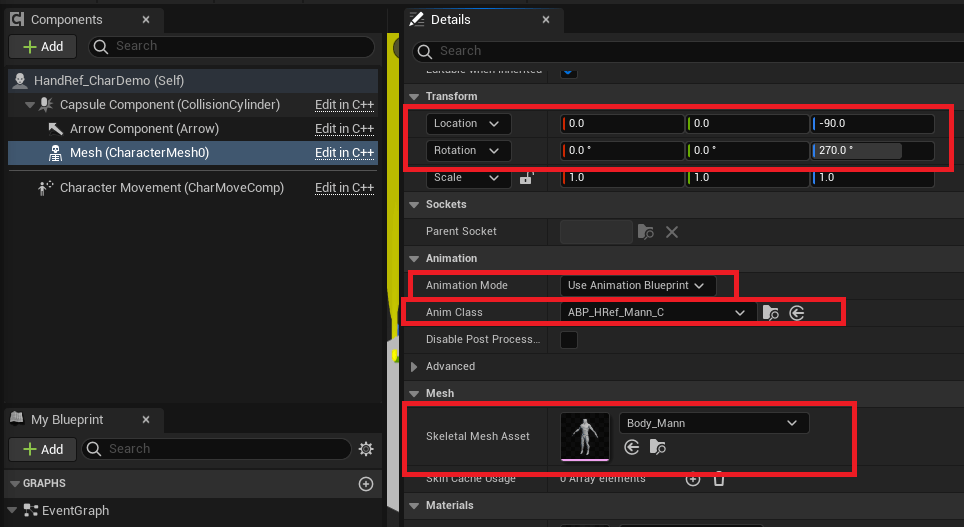
- On the the existing Mesh Component, change Skeletal Mesh Asset to “Body_Mann” (provided in this pack, based on UE4 mannequin), change Animation Mode to “Use Animation Blueprint”, and change Anim Class to “ABP_Href_Mann”. Finally, change the Location Z value to -90 and Rotation Z value to 270.
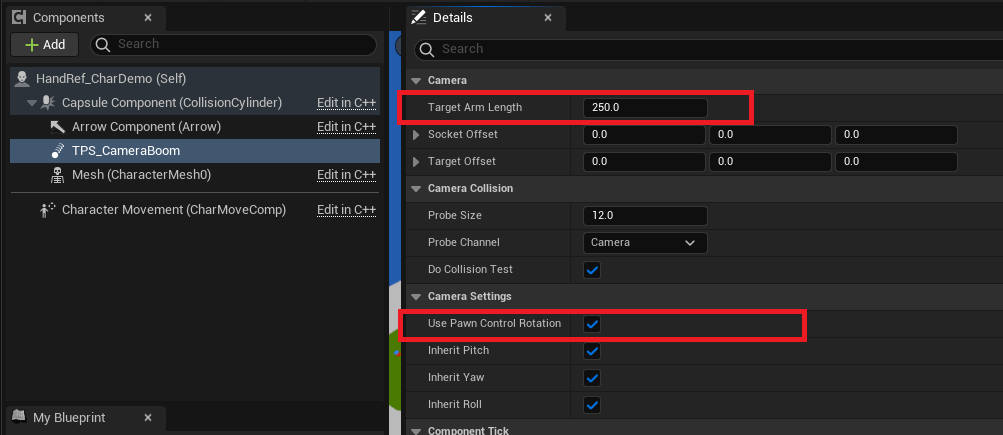
- Add a Spring Arm Component, attach it to the Capsule Component. Change Target Arm Length to 250, set Use Pawn Control Rotation as checked.
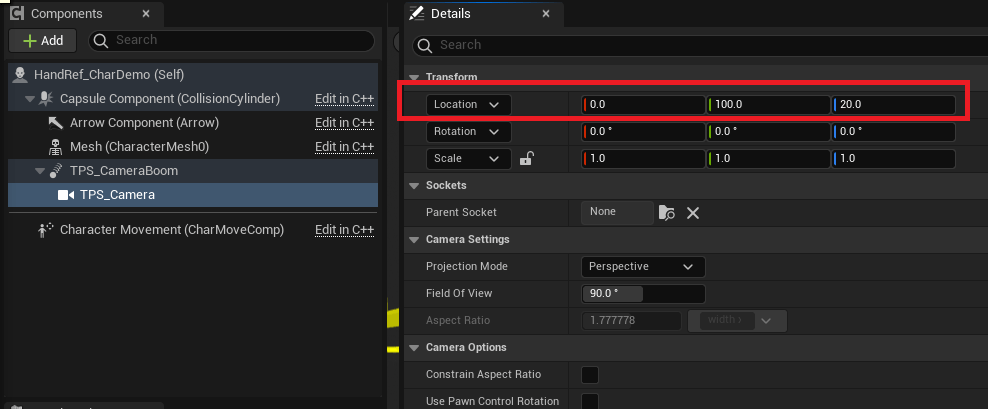
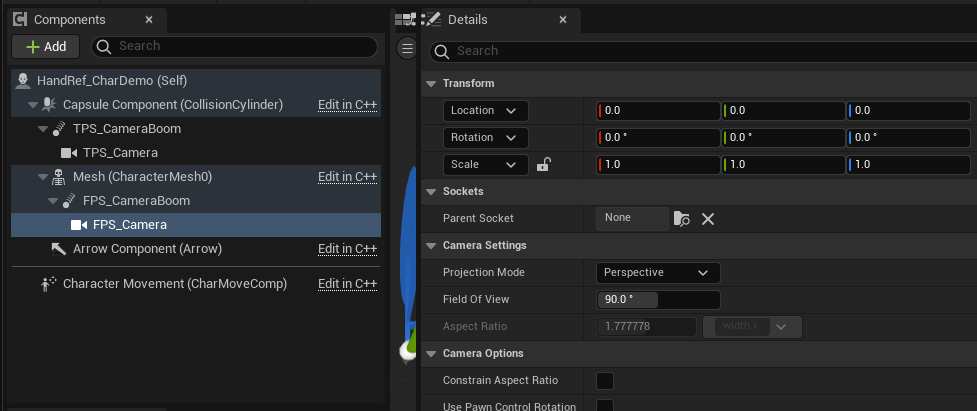
- Add a Camera Component for the TPS camera, attach it to the Spring Arm in the previous step. Change Transform Location to X:0; Y:100; Z:20;
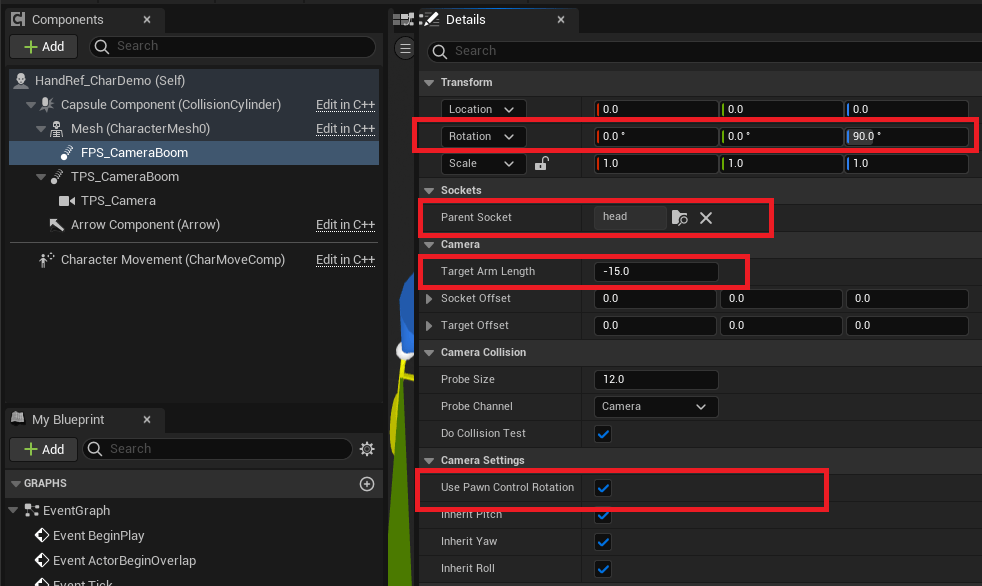
- Add a Spring Arm Component, attach it to the Mesh Component. Change the Parent Socket to “head”, change Target Arm Length to -15, set Use Pawn Control Rotation as checked, and finally, set Transform Rotation Z value to 90.
- Add a Camera Component for FPS Camera, attach it to the Spring Arm in the previous step.
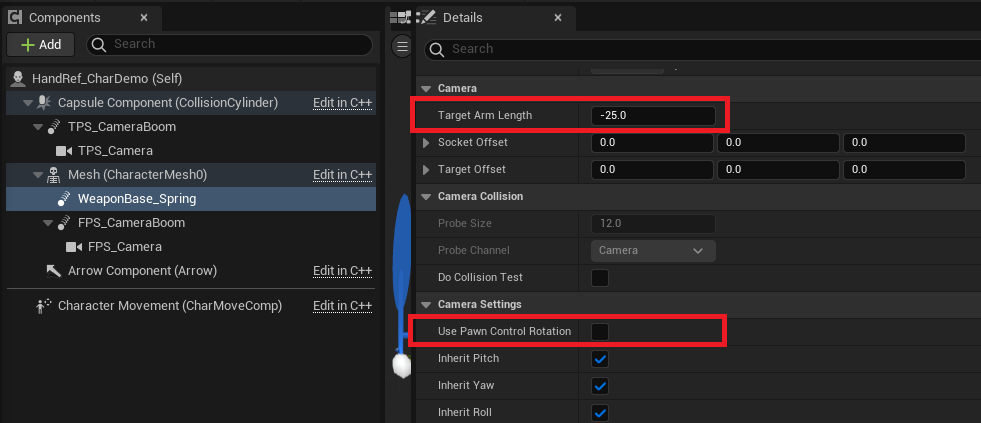
- Add a Spring Arm Component for the Weapon Base Spring, attach it to the Mesh Component. Change the Target Arm Length to -25, uncheck Use Pawn Control Rotation by default.
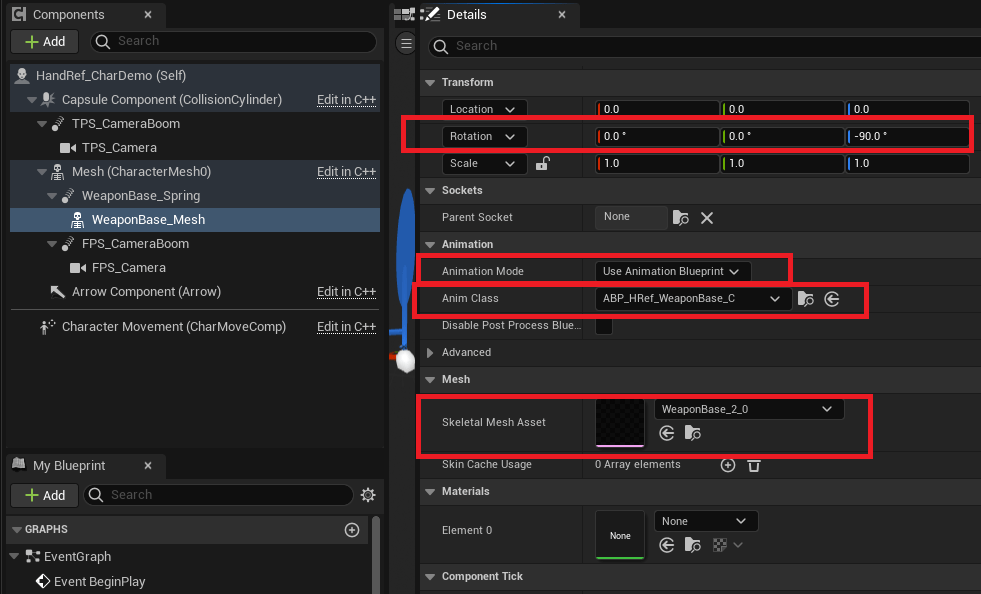
- Add a Skeletal Mesh Component for the weapon base, attach it to the Spring Arm in the previous step. Change Skeletal Mesh Asset to “WeaponBase_2_0”, change Animation Mode to “Use Animation Blueprint”, and change Anim Class to “ABP_Href_WeaponBase”. Finally, change the Transform Rotation Z value to -90.
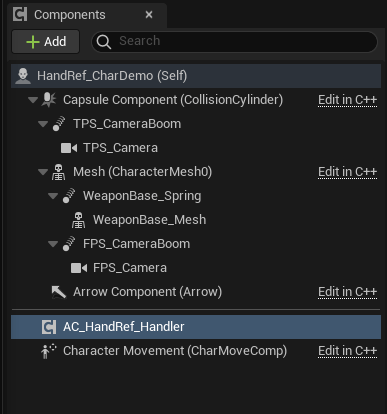
- Add AC_HandRef_Handler Component to the character itself.
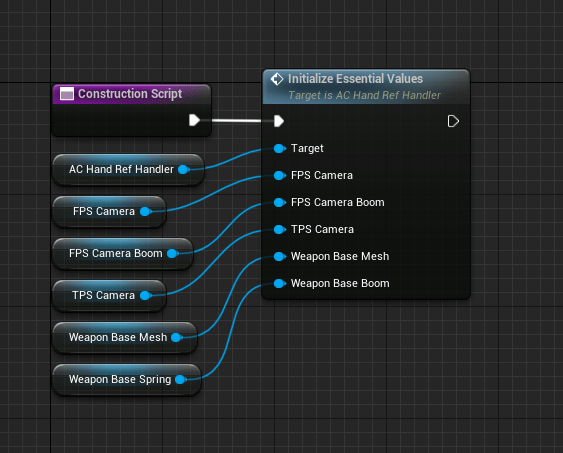
- Open this blueprint’s ConstructionScript function, drag the AC_HandRef_Handler Component and create “Initialize Essential Values” node. Link all the previously created components to this accordingly.
- In your graphs build off the Event BeginPlay to add mappings for IMC_Default_HRAnim and IMC_Weapons_HRAnim as illustrated below:

- In your graphs build off the Stance Changed event from the AC_HandRef_Handler as illustrated below:

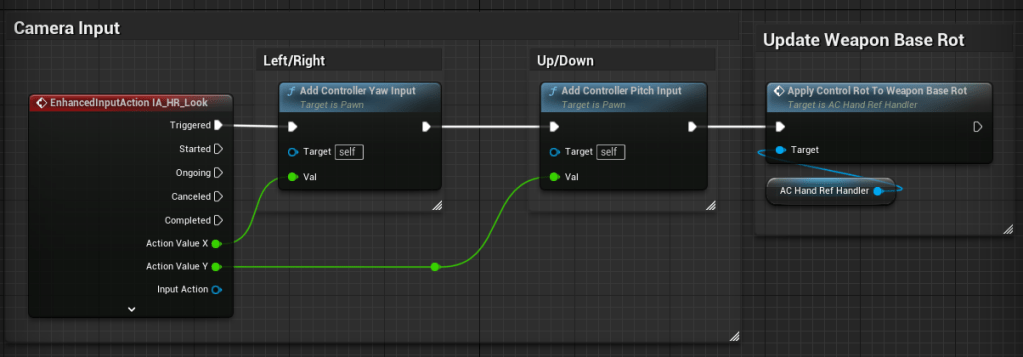
- Add Camera Control, create a node group in graphs as illustrated below:
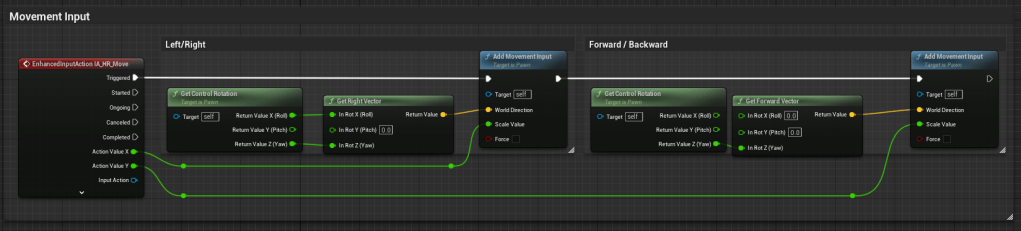
- Add Movement Control, create a node group in graphs as illustrated below:
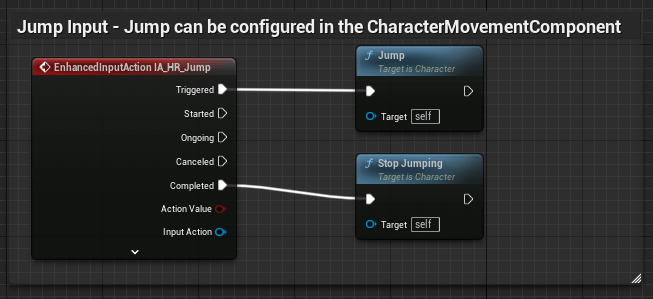
- Add Jump Control, create a node group in graphs as illustrated below:
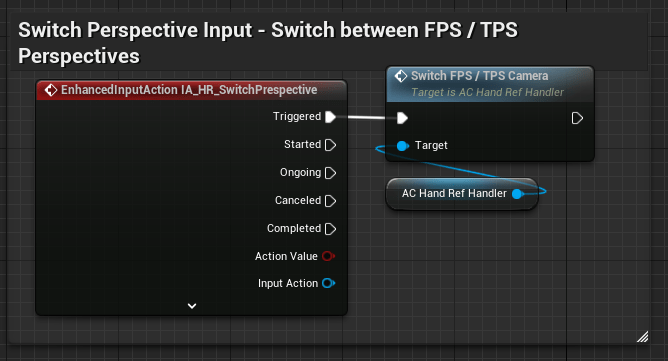
- Add Switch Perspective Control, create a node group using the Hand Ref Handler in graphs as illustrated below:
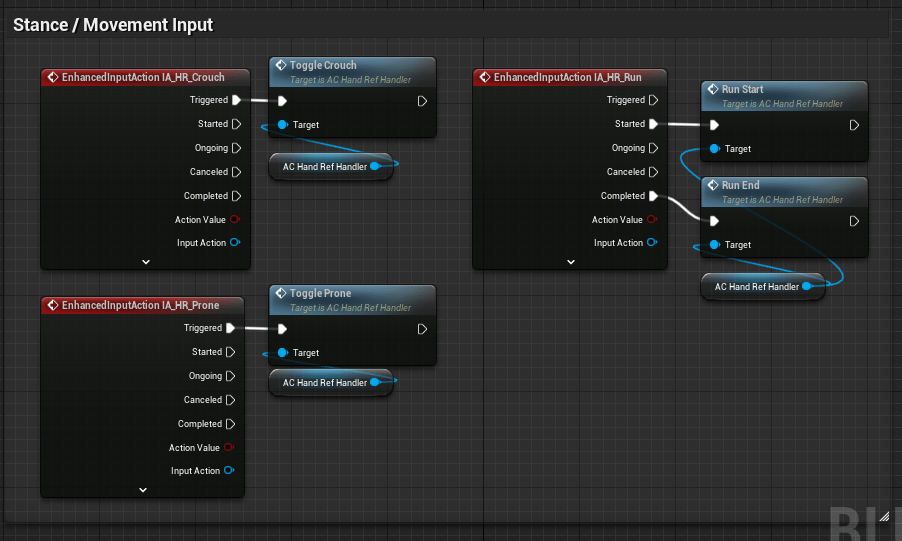
- Add Stance Controls, create a node group using the Hand Ref Handler in graphs as illustrated below:
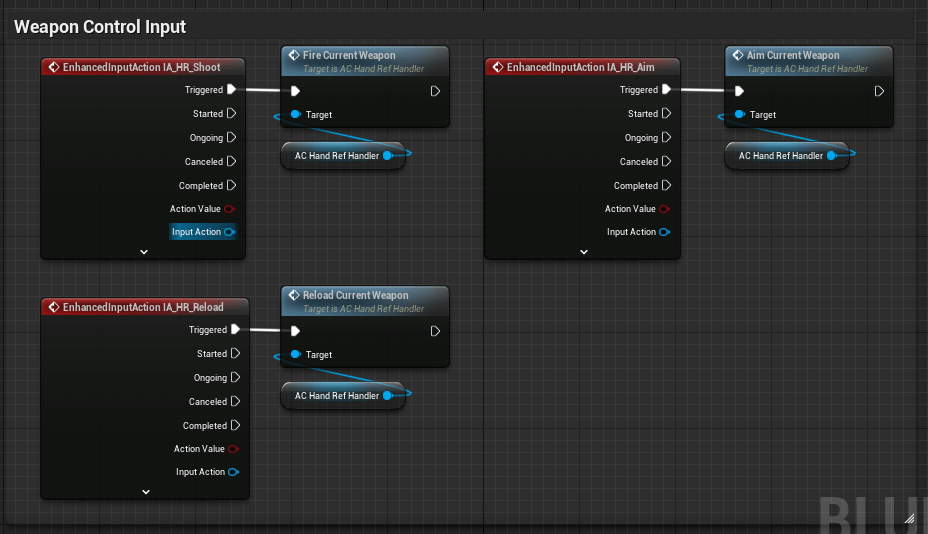
- Add Weapon Controls, create a node group using the Hand Ref Handler in graphs as illustrated below:
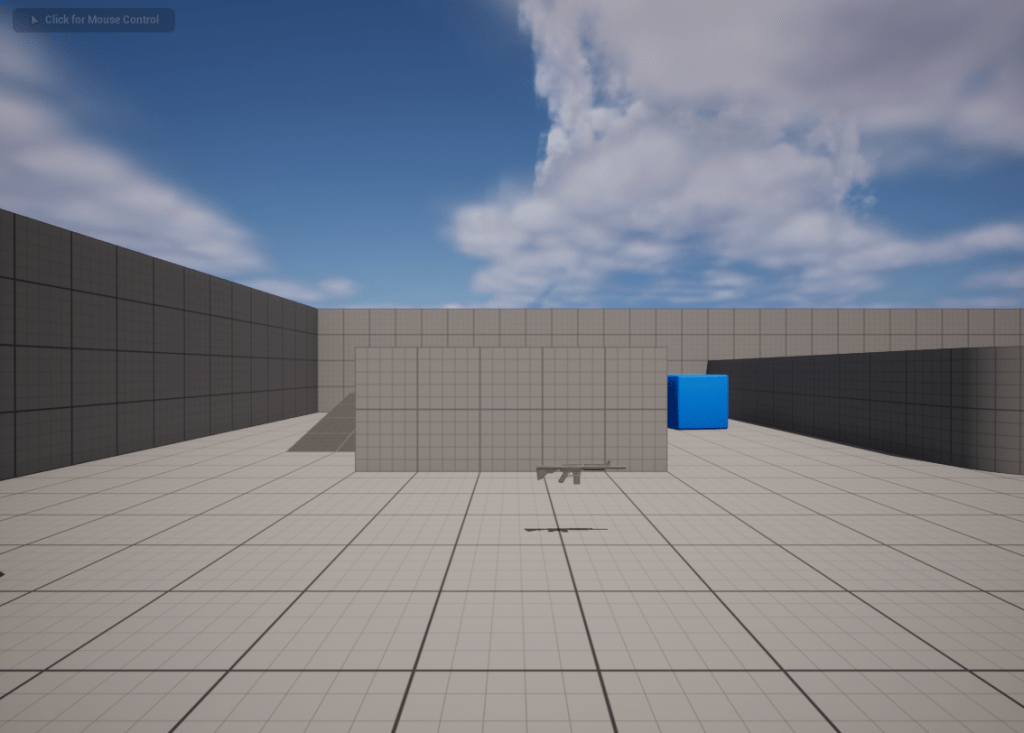
- Now you are finished setting up the character. Set this Character Blueprint you have created as Default Pawn Class much like in the Quick and Easy Method, place the demo Weapon Blueprint on the level scene, play and test.
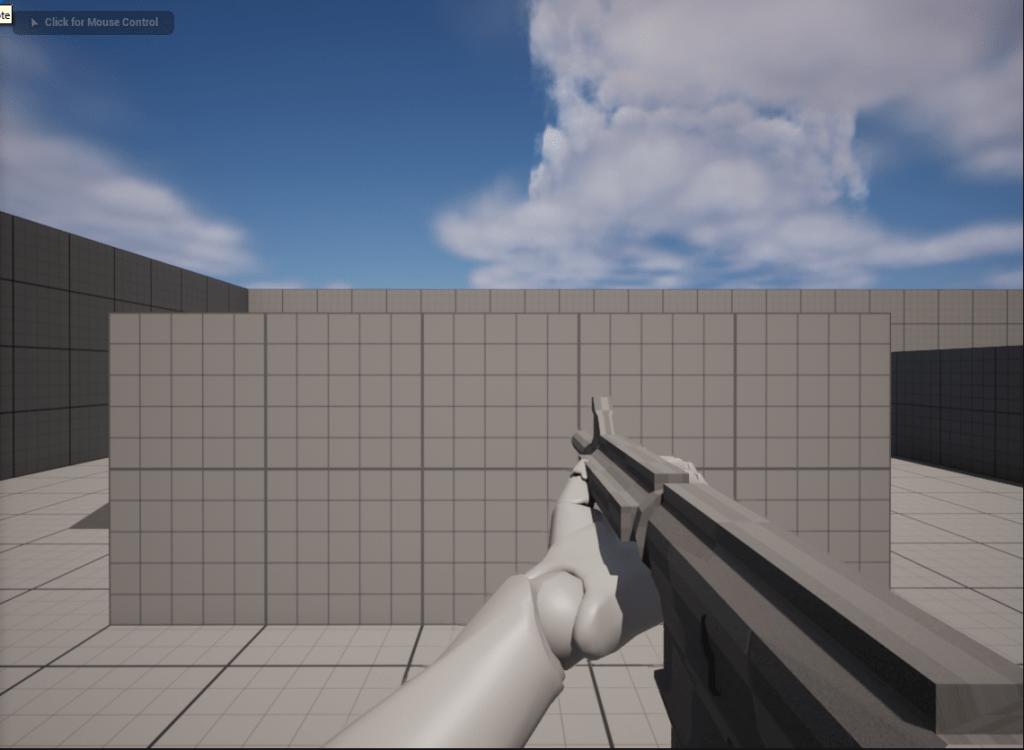
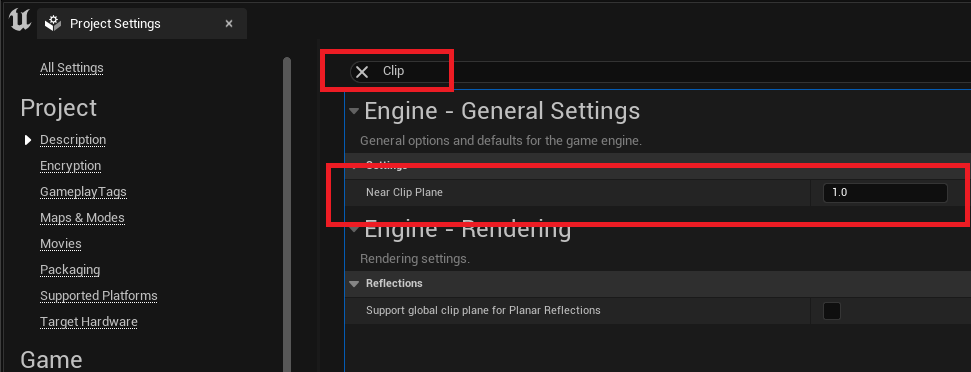
Extra: To make sure the FPS camera doesn’t clip through the body mannequin, go to top tab Edit > Project Settings… > in the search bar search “Near Clip Plane” > set it as low as possible value.

Default Key Mappings
- Move (IA_HR_Move)
- default key: [W], [A], [S], [D]
- Look (IA_HR_Look)
- default key: [Mouse Movement]
- Jump (IA_HR_Jump)
- default key: [Space bar]
- Toggle Crouch (IA_HR_Crouch)
- default key: [c]
- Toggle Prone (IA_HR_Prone)
- default key: [l ctrl]
- Run (IA_HR_Run)
- default key: [shift]
- Switch Perspective (IA_HR_SwitchPrespective)
- default key: [k]
- Fire Weapon (IA_HR_Shoot)
- default key: [lmb]
- Aim Weapon (IA_HR_Aim)
- default key: [rmb]
- Reload (IA_HR_Reload)
Configurable settings
Main Setting
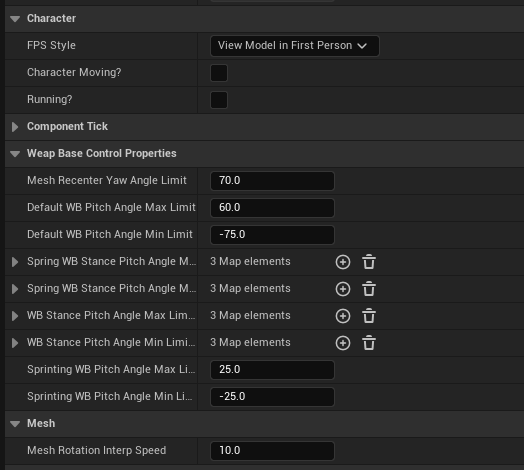
FPS Styles:
- View Model in First Person
- This mode is is tuned so the rotation update rate for the where the weapon is smooth imitating traditional implementations of a First Person Perspective. It also makes view model arms visible and makes arms in the Character mesh hidden. All this results in smooth FPS mode and an accurate hand placement in TPS.
- True First Person
- This mode prioritizes accuracy of the TPS hands even in First Person mode. It always make the hands on the Character mesh visible both in FPS or TPS. All this results in a “what you see in FPS is what you’ll see in TPS” scenario.
Additional Settings:
- Mesh Recenter Yaw Angle Limit
- When the current control Yaw exceeds this limit the Character Mesh Recenters to the Actor Yaw Angle
- Mesh Rotation Interp Speed
- How fast the Character Mesh Synch up to the Actor Yaw angle when the Mesh Recenter Yaw Angle Limit is hit.
- How fast the Character Mesh Synch up to the Actor Yaw angle when the Mesh Recenter Yaw Angle Limit is hit.
- Spring WB Stance Pitch Angle Max Limit Dict
- Spring WB Stance Pitch Angle Min Limit Dict
- The Pitch Angle limit for the Spring the Weapon Base is attached to. If the Pitch reaches the Min or Max values the spring will not further climb or descend. It is also designed so you can assign different Min and Max values for different stances.
- The Pitch Angle limit for the Spring the Weapon Base is attached to. If the Pitch reaches the Min or Max values the spring will not further climb or descend. It is also designed so you can assign different Min and Max values for different stances.
- WB Stance Pitch Angle Max Limit Dict
- WB Stance Pitch Angle Min Limit Dict
- The Pitch Angle limit for the Weapon Base. If the Pitch reaches the Min or Max values the Weapon Base will not further climb or descend. Can assign different Min and Max values for different stances.
- The Pitch Angle limit for the Weapon Base. If the Pitch reaches the Min or Max values the Weapon Base will not further climb or descend. Can assign different Min and Max values for different stances.
- Default WB Pitch Angle Max Limit
- Default WB Pitch Angle Min Limit
- If no Min or Max is assigned to any of the Spring WB or WB stances it will default to these values.
- If no Min or Max is assigned to any of the Spring WB or WB stances it will default to these values.
- Sprinting WB Pitch Angle Max Limit
- Sprinting WB Pitch Angle Min Limit
- The Pitch Angle limit for when the Character is Sprinting. If the Pitch reaches the Min or Max values the Weapon Base will not further climb or descend.
